A misaligned bow sight is one of the most common reasons archers struggle to hit consistently — even archers with excellent form. Sighting in a bow correctly is a systematic process that, once understood, takes less than an hour and dramatically improves your accuracy at any distance. This complete guide covers everything: single-pin vs multi-pin sights, the initial 10-yard setup, walk-back tuning, micro-adjustments, and the often-overlooked third axis.
⚡ The Golden Rule of Sight Adjustment
Follow the arrow: move your sight pin in the same direction your arrows are hitting. Hitting left? Move the sight left. Hitting high? Move the sight up. This is counterintuitive at first but always correct.
🔭 Single-Pin vs Multi-Pin Sights
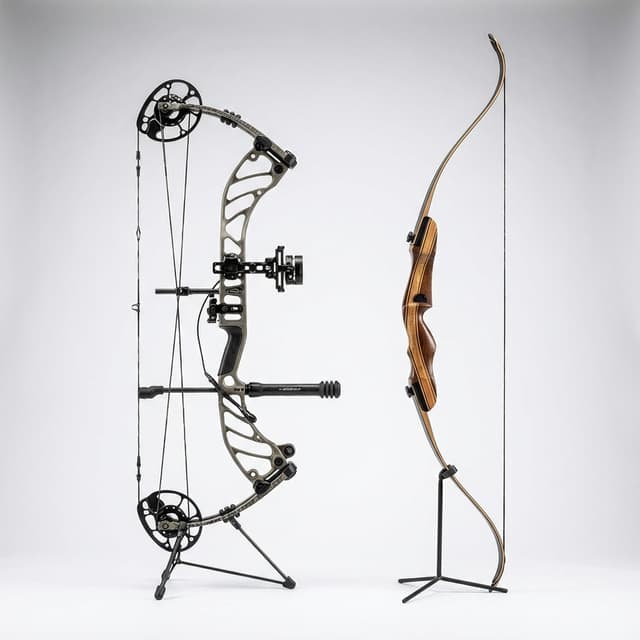
Before you can sight in your bow, you need to understand what type of bow sight you have — the setup process differs slightly between them.
Single-Pin Moveable Sight
One aiming pin on a sliding track. You dial the pin to the exact distance before each shot.
- ✅ Uncluttered sight picture
- ✅ Exact yardage for any distance
- ✅ Popular for 3D archery and field
- ❌ Must know distance before shooting
- ❌ Slower to adjust for unknown distances
Best for: Target archery, 3D competition, hunters who range before drawing
Multi-Pin Fixed Sight
3–7 fixed pins, each set to a specific distance (e.g., 20, 30, 40, 50 yards). Pick the correct pin for your target distance.
- ✅ Instant reference — no adjusting
- ✅ Faster for hunting scenarios
- ✅ Redundancy if one pin is lost
- ❌ Pin clutter at closer distances
- ❌ Must gap-shoot between pins at odd distances
Best for: Hunting, 3D, archers who shoot varied distances quickly
🛠️ What You Need Before Starting
Sight-In Checklist
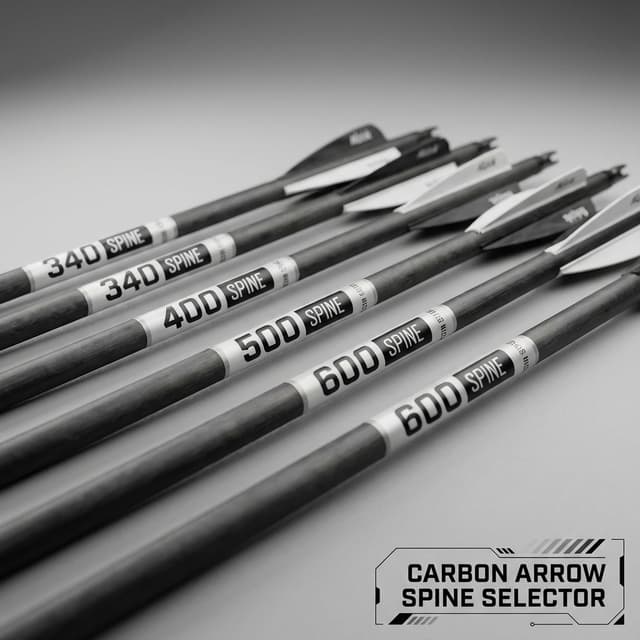
- ✅ A properly tuned bow (paper tuned, correct arrow spine)
- ✅ A sight with the sight tape or pins ready to adjust
- ✅ A small hex/Allen key set matching your sight's screws
- ✅ A consistent shooting form — sight-in magnifies your habits
- ✅ A target at a known, measured distance
- ✅ At least 6 arrows to establish groups, not individual shots
A sight cannot fix a poorly tuned bow. If your arrow flight is erratic (fishtailing or porpoising), fix your bow tuning first. Trying to sight in a bow with bad arrow flight will only frustrate you.
📍 Step 1: Initial Setup at 10 Yards
Always start close. Beginning at 10 yards (or even 5 yards for complete beginners) means your arrows stay on the target while you make large initial adjustments. Never start sight-in at 20 or 30 yards — you'll likely miss the target entirely.
10-Yard Sight-In Process
- Stand exactly 10 yards from your target (use a tape measure)
- Set your top pin (or single pin) to approximately 10 yards on the scale
- Shoot a group of 3–6 arrows with consistent form
- Note where the GROUP lands — not individual fliers
- Move the sight housing (entire bracket) toward the group
- Shoot again and repeat until the group is centered
- Once centered at 10 yards, move back to 20 yards
Understanding Sight Adjustments
Elevation (Up/Down)
- • Arrows hitting HIGH → move sight UP
- • Arrows hitting LOW → move sight DOWN
Windage (Left/Right)
- • Arrows hitting LEFT → move sight LEFT
- • Arrows hitting RIGHT → move sight RIGHT
📏 Step 2: Setting Multiple Distances
Once centered at 10 yards, the process repeats at each distance. For a multi-pin sight, you set each pin individually. For a single-pin sight, you'll shoot at multiple distances to create a sight tape.
Multi-Pin Setup Order
- Sight in top pin at 20 yards (do NOT move the housing — only move that specific pin)
- Once 20 yards is dialed, move to 30 yards
- Adjust second pin only until group hits center at 30 yards
- Continue for 40, 50, 60 yards as needed
- Do not re-adjust the housing after initial centering — only individual pins move
Single-Pin Sight Tape Method
- Sight in perfectly at 20 yards, note the indicator position on the tape
- Move back to 30 yards, dial until perfect — note position again
- Repeat at 40, 50, 60 yards
- Most sight manufacturers provide pre-printed tapes matching arrow speed — these are a starting point only; your own measurements are more accurate
- Create a custom tape with your actual distance marks
🚶 The Walk-Back Tuning Method
The walk-back method is a powerful technique to verify that your center shot (arrow rest position left/right) is perfectly aligned. It reveals windage errors that worsen with distance — errors that standard 20-yard sight-in can't detect.
Walk-Back Method: Step by Step
- Place a vertical tape strip on your target (from top to bottom)
- Sight in at 20 yards perfectly, with the pin centered on the top of the tape
- Move back to 30 yards — aim at the SAME point (top of tape) WITHOUT touching the sight
- Shoot. Note where the arrow lands relative to the tape
- Move back to 40 yards, then 50 yards — always aiming at the same spot
- All arrows should land on the vertical tape. If they drift left or right, adjust the rest
Reading Walk-Back Results:
- • Arrows drift RIGHT as distance increases → Move rest LEFT
- • Arrows drift LEFT as distance increases → Move rest RIGHT
- • All arrows on the tape → Perfect center shot!
Move your arrow rest only 1/32" at a time during walk-back tuning. Small rest movements create large changes in arrow impact at distance. After each adjustment, repeat the full walk-back sequence before moving again.
🔬 Micro-Adjustments: Fine-Tuning for Precision
Once your sight is close, micro-adjustments let you dial in the last few millimeters of precision. This is where competition shooters separate from recreational archers.
| Scenario | Cause | Fix |
|---|---|---|
| Groups shift high in hot weather | String stretches slightly in heat | Move sight up 1–2 clicks |
| 20-yard perfect, 30-yard high | Pin spacing too wide | Move 30-yard pin up slightly |
| Consistent left drift all distances | Windage off-center | Adjust sight windage left 2–3 clicks |
| Groups open up at 50+ yards | Form inconsistency amplified, or wind | Strengthen form before chasing sight |
| New arrows hit differently than old | Different spine, weight, or length | Re-tune and re-sight with new arrows |
❌ Common Micro-Adjustment Mistakes
- • Chasing single arrows — always adjust based on group centers (3+ arrows), not one flier
- • Adjusting in windy conditions — wind affects arrows more than sight alignment; wait for calm days
- • Over-adjusting — most micro-adjustment screws move 1/100" per click; be patient
- • Forgetting to tighten lock screws — loose sights shift during shooting
📐 Third Axis: What It Is and When to Level It
The third axis is the most misunderstood sight adjustment, and most casual archers never touch it. But if you shoot from uneven terrain, sloped ground, or angled tree stands, a mis-leveled third axis will cause your arrows to hit consistently off-center — even with perfect form and correct windage.
1st Axis
Windage plane — the sight pin moving left/right. This is your basic windage adjustment.
2nd Axis
Vertical cant — leveling the sight housing so it's perfectly plumb. This is the most common axis adjusted.
3rd Axis
The fore-aft tilt — when you cant the bow sideways (as on a hillside), the sight plane tilts relative to gravity. Critical for steep angle shots.
When Does Third Axis Matter?
- • Tree stand hunters shooting downward at steep angles
- • Mountain/3D archers shooting uphill or downhill across slopes
- • Field archers on courses with severe elevation changes
- • Not critical for flat ground target shooting at standard distances
Third axis adjustment requires a special level tool and is best done with a professional, or following your specific sight manufacturer's instructions. Most modern premium sights include third-axis adjustability; budget sights often do not.
🏹 Sighting In a Recurve Bow
Recurve bow sight tuning follows the same "follow the arrow" principle but uses a simpler single-pin setup. Most Olympic recurve archers use a long-rod sight with a single pin set at a specific distance (18m indoor, 70m outdoor).
Recurve Sight-In Process
- Start at 10 meters (or 10 yards) with no wind
- Shoot groups of 3 and move the pin toward where arrows land
- Once centered at 10m, move to 18m (indoor) or 30m, then 50m, then 70m
- At each distance, only adjust elevation (up/down) — windage rarely needs changing if anchor point is consistent
- Mark each distance position on the sight bar for repeatable setup
❓ Frequently Asked Questions
How many arrows does it take to sight in a bow?▼
Why are my arrows hitting right at 30 yards but centered at 20 yards?▼
Do I need to re-sight my bow after changing arrows?▼
How often should I check my bow sight?▼
Track Your Sight-In Progress with ArcheryBuddy
Log your sight settings, distances, and arrow impacts in ArcheryBuddy. Track your groups over time and see exactly how your adjustments improve your accuracy.
Sight-In Quick Reference
- ✓Always follow the arrow — move your sight in the same direction as the miss
- ✓Start at 10 yards with the housing, then only move individual pins at longer distances
- ✓Adjust based on groups of 3+ arrows, never single shots
- ✓Walk-back tune to confirm center shot is correct across all distances
- ✓Third axis only matters for shooting on significant slopes or from tree stands