Whether you're just starting your archery journey or getting back into it after a break, mastering proper form is the foundation of accurate, consistent shooting. Unfortunately, many beginners unknowingly develop bad habits that can limit their progress and even cause injury.
In this comprehensive guide, we'll break down the 10 most common form mistakes we see at the range, explain why they hurt your accuracy, and show you exactly how to fix them. Let's get started!
1. The Death Grip
One of the most common mistakes beginners make is squeezing the bow handle like their life depends on it. This "death grip" creates tension in your hand and forearm, which transfers directly into the bow at the moment of release.

Use a relaxed, open hand grip. The bow should rest on the meaty part of your thumb (the thenar muscle) with your fingers loosely curled—not wrapped around the riser. Many archers use a bow sling so they don't have to worry about dropping the bow.
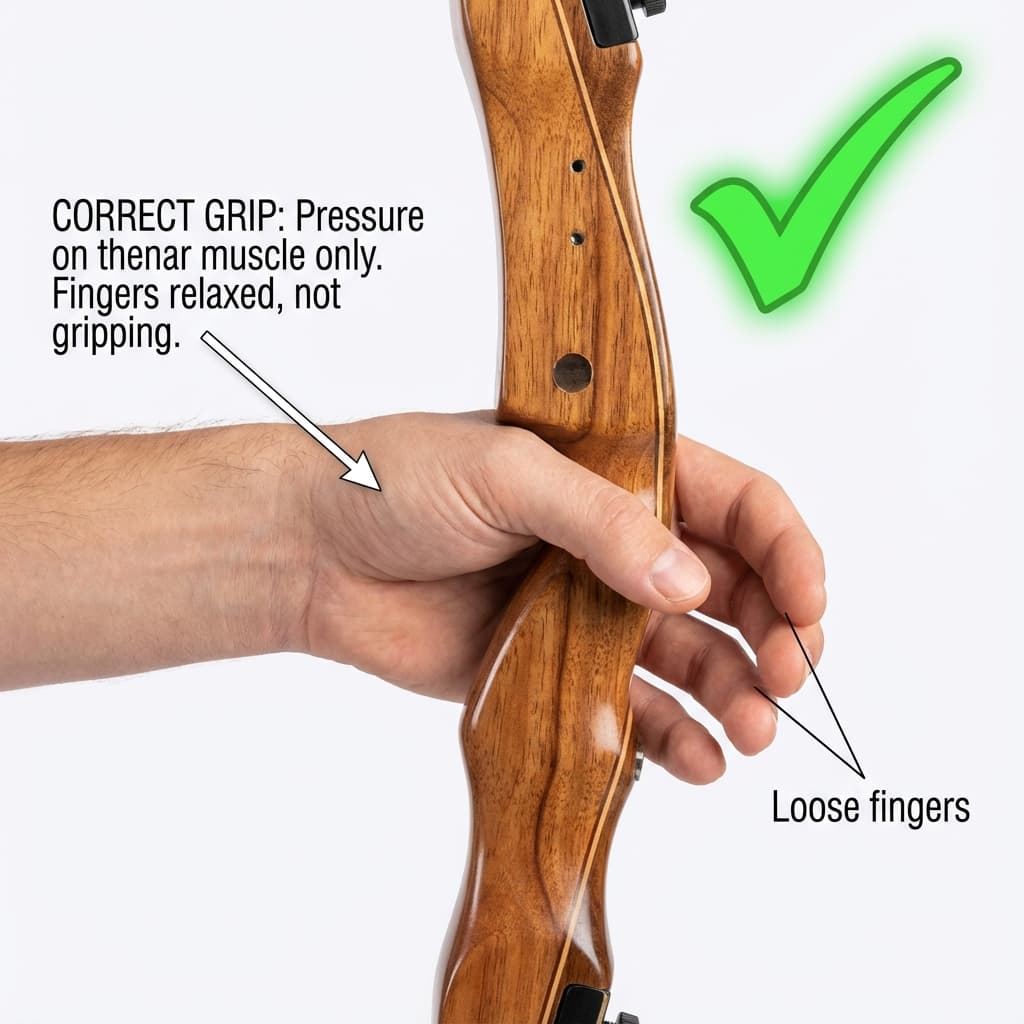
After release, the bow should naturally tip forward in your hand. If it doesn't move at all, you're probably gripping too tightly.
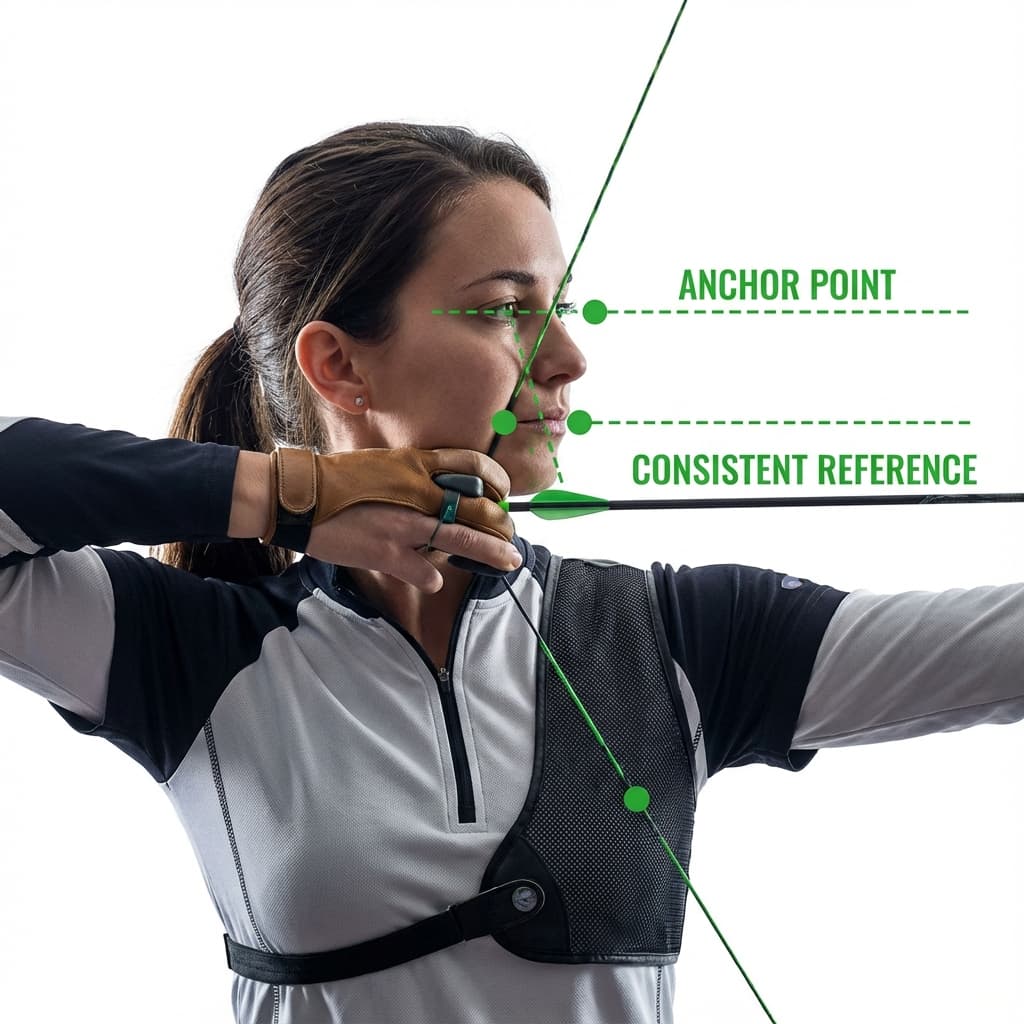
2. Inconsistent Anchor Point
Your anchor point is where your draw hand consistently touches your face at full draw. Without a reliable anchor, every shot will have a different draw length, making accuracy impossible.

Choose an anchor that you can replicate every single time. Common anchor points include:
- Index finger under chin with string touching nose and corner of mouth
- Thumb behind jaw for compound shooters
- Tab or release touching corner of mouth
Practice coming to the same anchor repeatedly until it becomes automatic.
3. Poor Stance and Alignment
Many beginners stand facing the target or with their feet too close together. This creates instability and makes it harder to draw the bow using your back muscles.
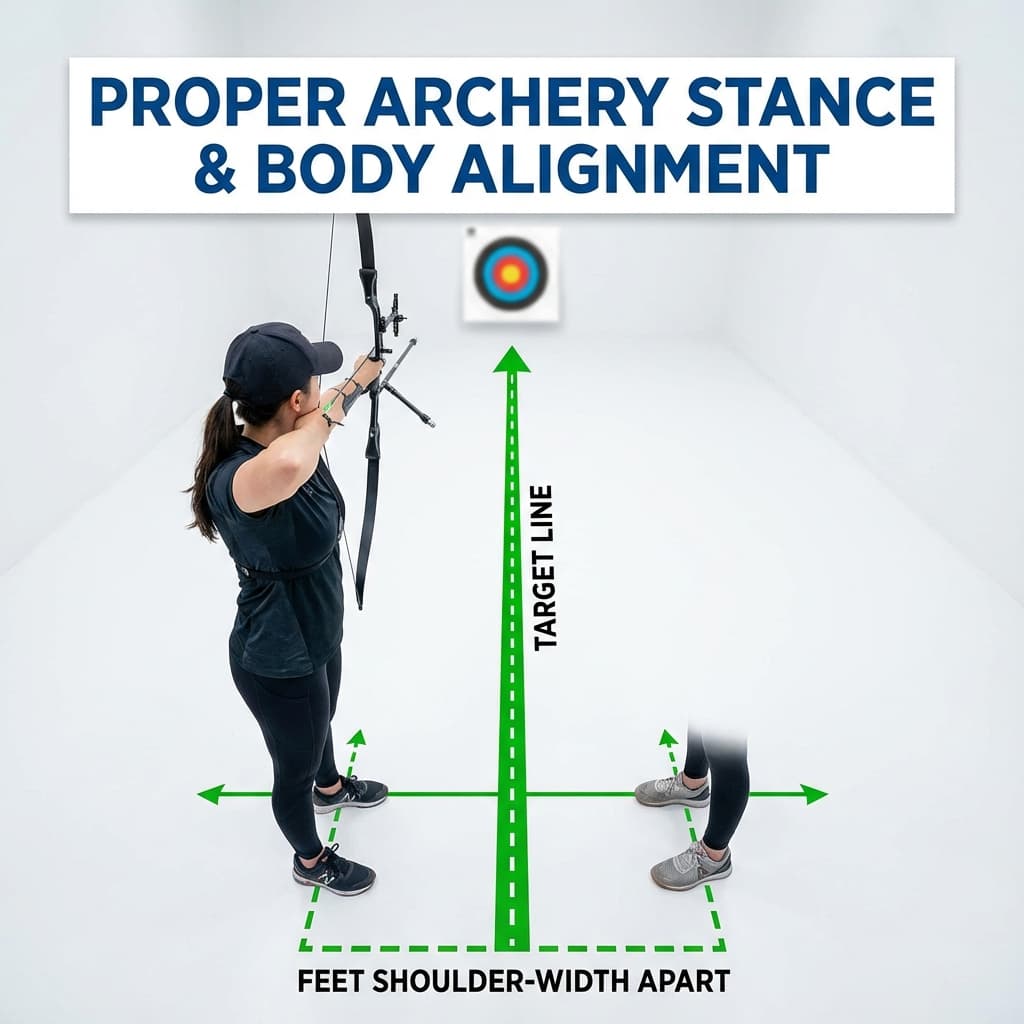
Stand with feet shoulder-width apart, perpendicular to the shooting line. Your weight should be evenly distributed, with a slight lean toward the target. Draw an imaginary line from your arrow through your shoulders to the target— this entire line should be straight.
4. Locked Bow Arm Elbow
Locking your elbow straight puts the inside of your arm (the elbow pit) directly in the path of the string. Hello, painful string slap!
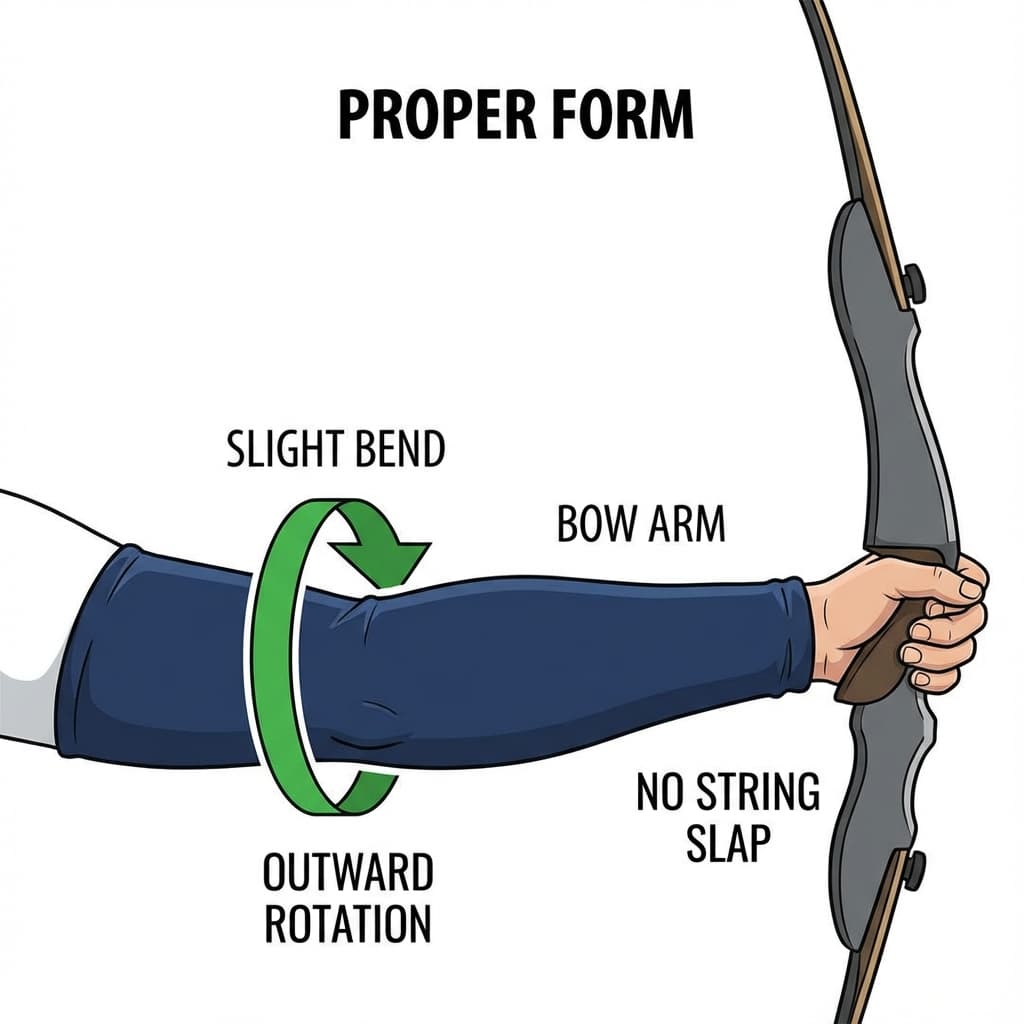
Keep a slight bend in your bow arm and rotate your elbow outward so the inside of your elbow faces away from the string. This clears the string path and creates a more stable shooting platform.
5. Plucking the String
Instead of letting the string slip naturally from their fingers, many beginners "pluck" the string by actively pulling their fingers away. This creates lateral movement in the string, causing arrows to fly erratically.
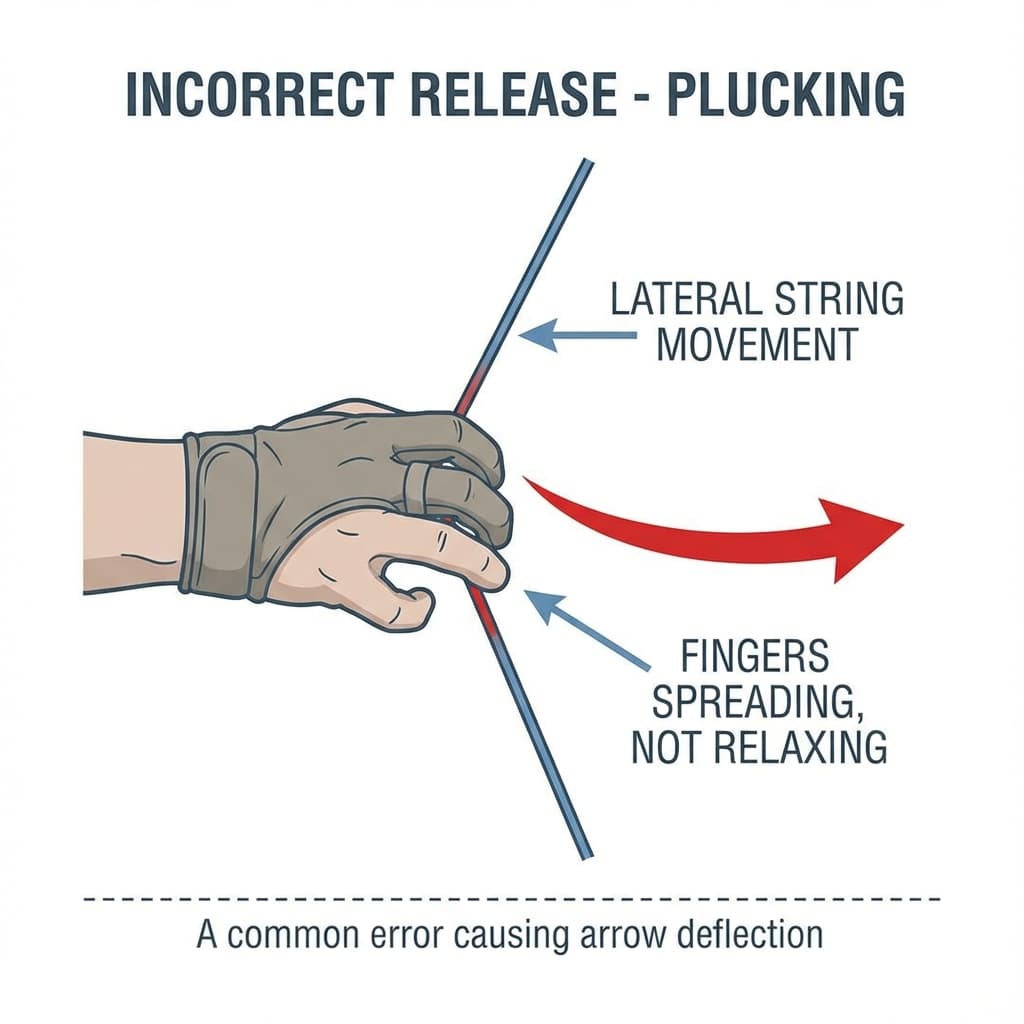
Focus on relaxing your fingers rather than moving them. Think of the release as "letting go" rather than "pulling away." Your fingers should simply relax and let the string push them out of the way.
Practice the release motion without an arrow. Draw to anchor, then simply relax your fingers while maintaining back tension. You should feel the string slip away, not be pushed away.
6. Target Panic / Snap Shooting
Target panic is when archers release the arrow the moment their sight touches the target, without settling and aiming properly. This is often caused by fear of the bow or over-focusing on the target.
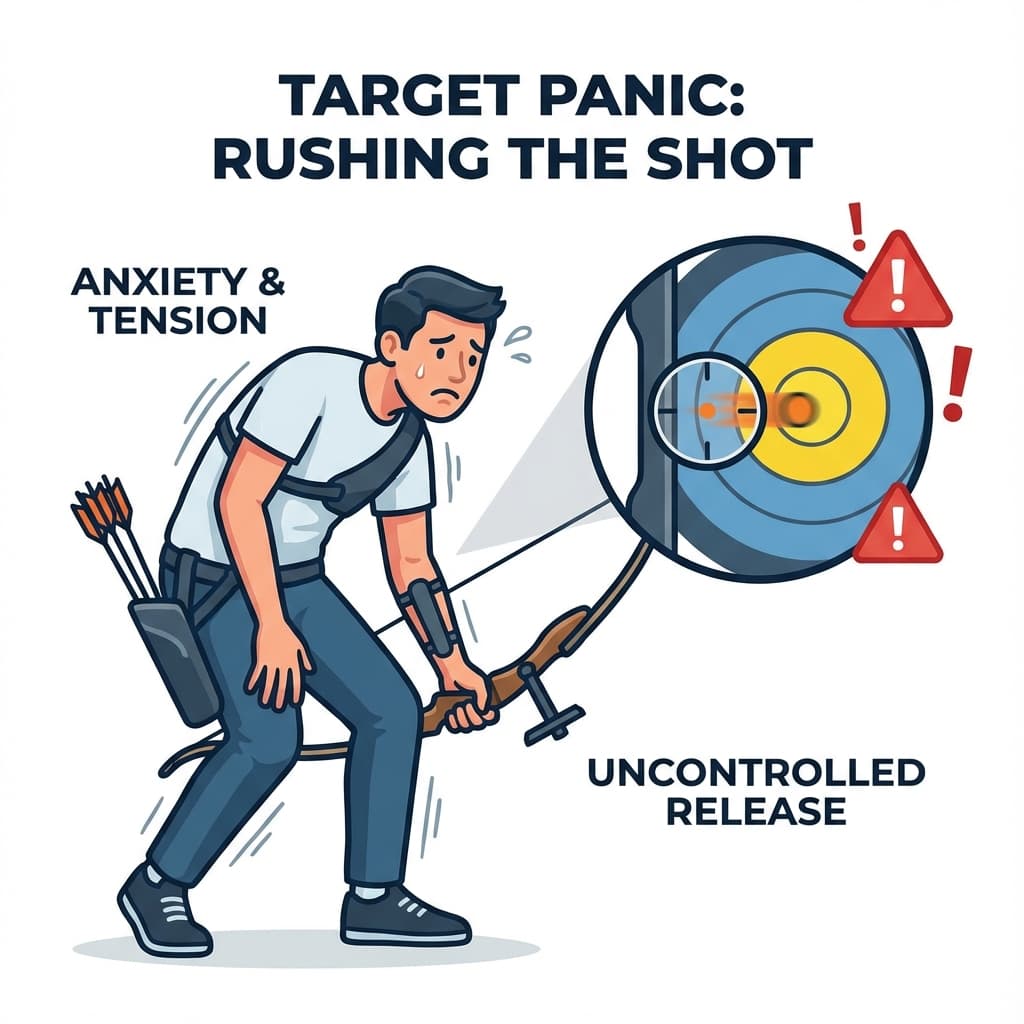
Build a consistent shot sequence and stick to it every time. Practice at blank bale (a target with no face) to focus purely on form. When aiming, let your pin float naturally—trying to hold it perfectly still often makes things worse.
7. Collapsing at Full Draw
Collapsing happens when you stop engaging your back muscles at full draw, causing your draw length to shorten and your aim to drop. This often happens when archers get tired or distracted.
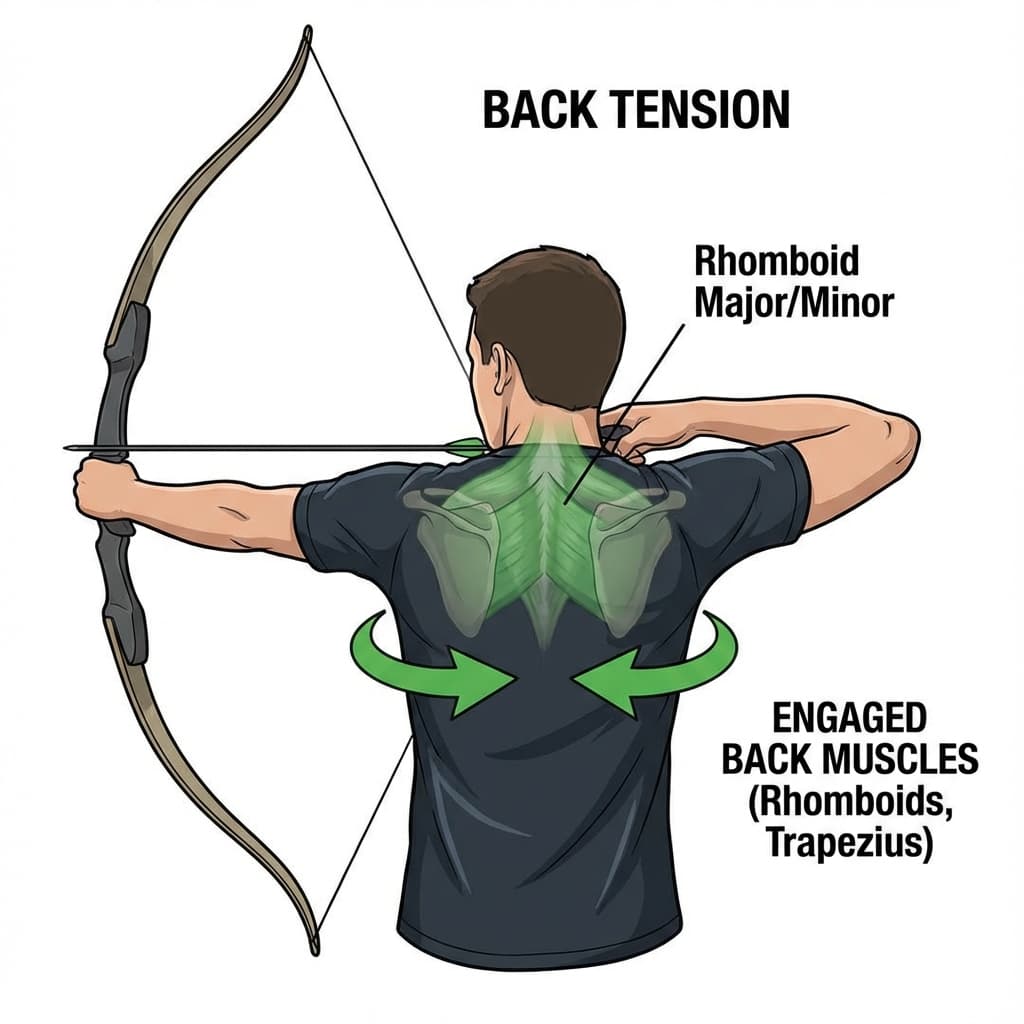
Maintain continuous back tension throughout the shot. Think about squeezing your shoulder blades together rather than pulling with your arm. The draw should come from your back, not your bicep.
8. Moving Your Head to the String
Some archers tilt or move their head to meet the string rather than drawing the string to their face. This creates inconsistency and often results in neck strain.
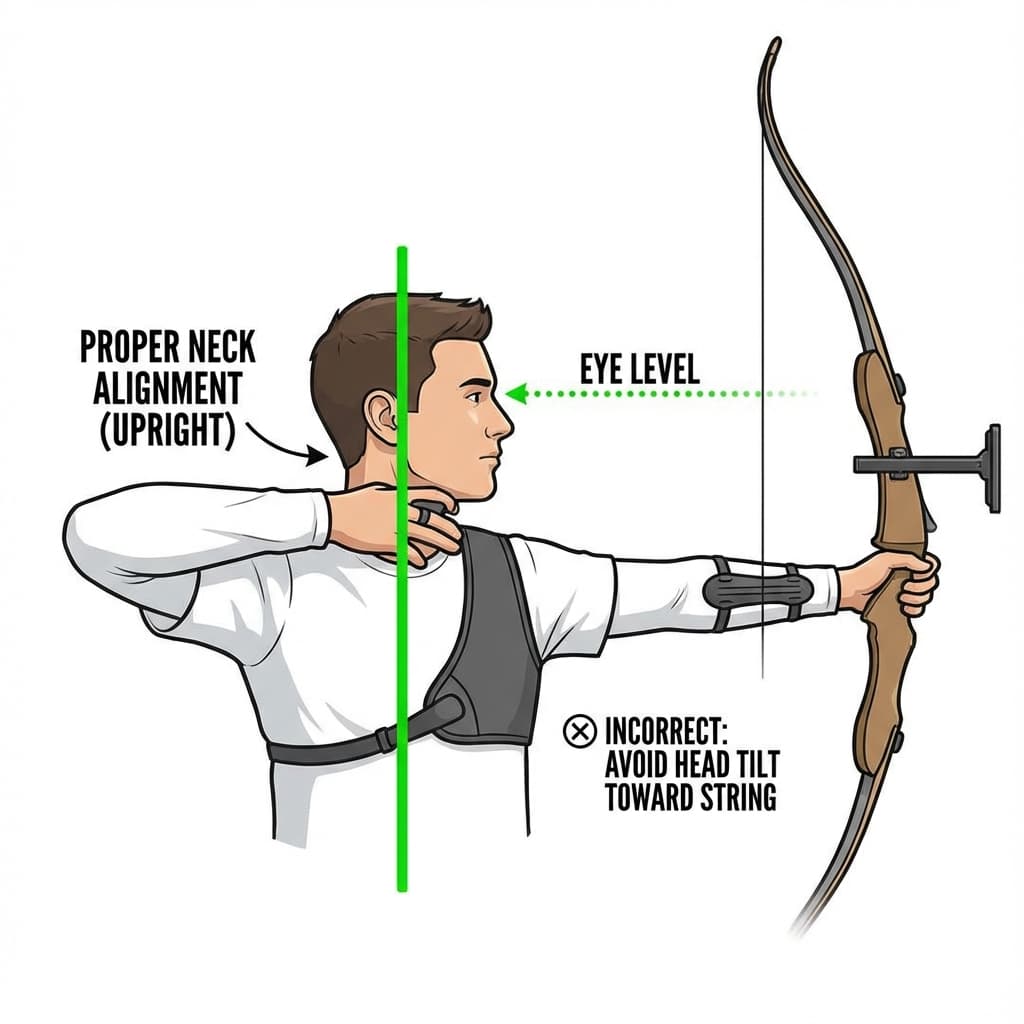
Keep your head upright and still. Turn your head to look at the target, but don't tilt or lean. Draw the string to come to your face—not the other way around.
9. Incorrect Draw Length
Shooting a bow with the wrong draw length is like wearing shoes that don't fit. Too long and you'll overextend and strain; too short and you'll bunch up and lose power.
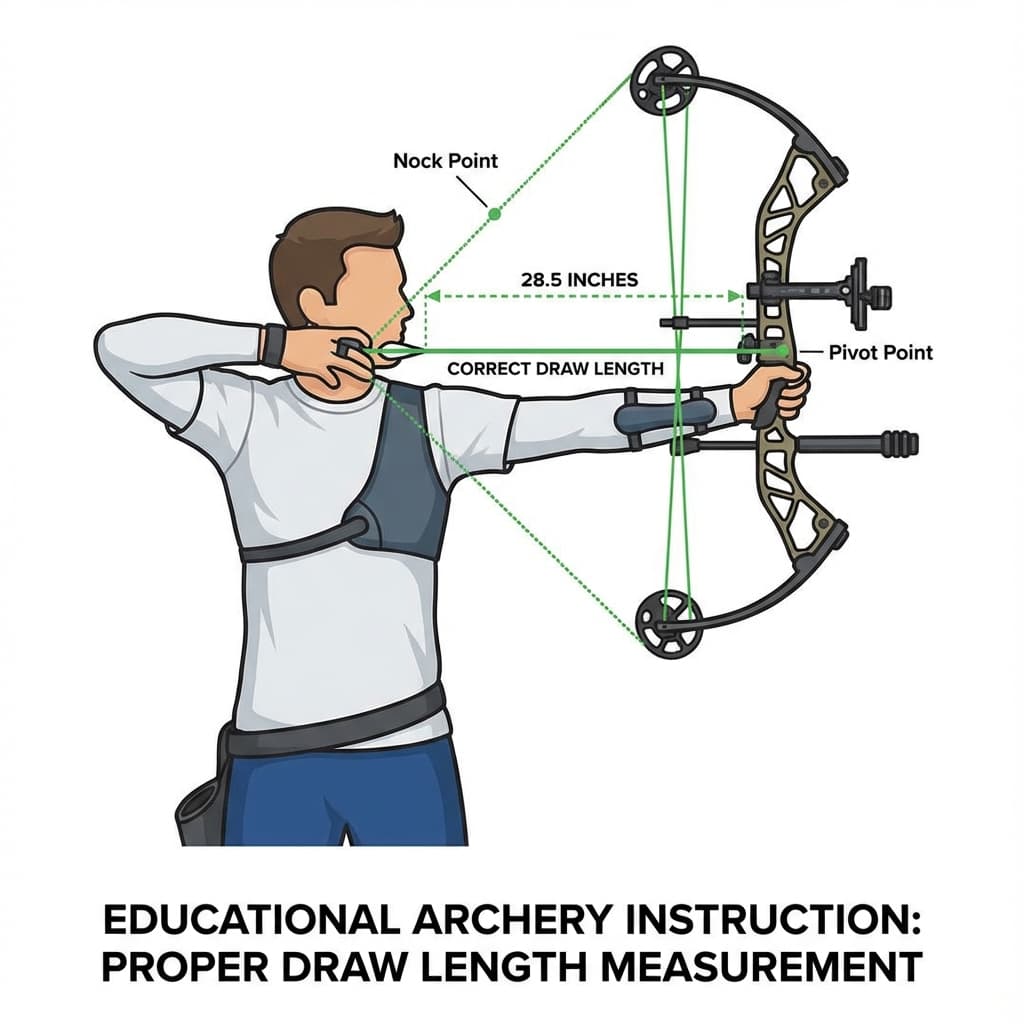
Get your draw length measured properly by a qualified coach or pro shop. A simple formula: (Arm span ÷ 2.5) gives a rough estimate. However, nothing beats having an experienced archer watch you shoot and make adjustments.
10. Rushing Between Shots
In the excitement of shooting, many beginners fire arrows rapidly without resetting between shots. This leads to fatigue, sloppy form, and diminishing accuracy.
Take a breath between each shot. Lower the bow, relax, review what happened, and then approach the next shot fresh. Quality practice beats quantity every time.
📌 Key Takeaways
- Use a relaxed grip—don't squeeze the bow
- Develop a consistent anchor point and hit it every time
- Stand with proper stance and alignment
- Keep a slight bend in your bow arm and rotate the elbow out
- Relax your fingers on release—don't pluck
- Build a shot sequence to combat target panic
- Maintain back tension throughout the shot
- Keep your head still—bring string to face
- Get your draw length measured properly
- Take your time between shots
Ready to Perfect Your Form?
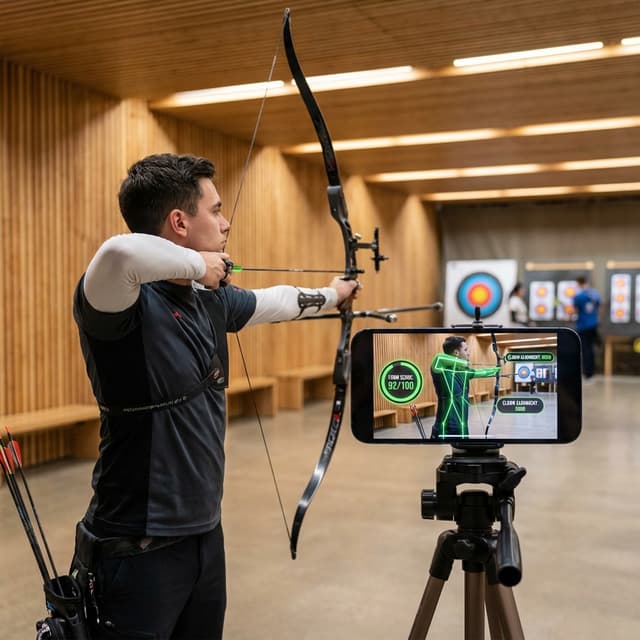
ArcheryBuddy uses AI to analyze your shooting form and give you instant feedback on exactly what to improve. Download free and start shooting better today!